- Posted By: beekeeper
- Comments: 0
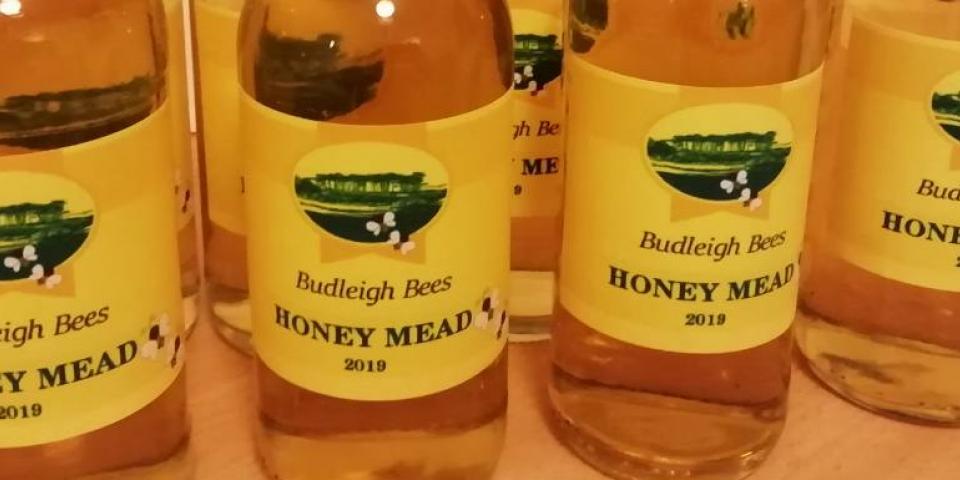
This one I've been keeping under wraps for the best part of this year as wasn't sure if it would work, but after months of doing my best not to disturb things, I finally bottled my first attempt at making honey mead.
It all came about after I extracted honey too early (rookie error as a beginner) which meant there was too much water content causing the honey to ferment. I didn't have the heart to throw away 4lb of honey so kept it for a while wondering what to do with it. Having looked for ideas, I came across a video that had been recommended, especially for beginners. I had nothing to lose, so decided to give it a go.
With a colleague at work offering to lend me his wine-making kit, I jumped at the chance. There was no turning back.
With a couple of demijohns picked up from the recycling centre, I set about sterilising everything before I could begin and followed the video every step of the way.
I had absolutely now idea how the murky coloured liquid was ever going to turn into its wonderful golden colour that I see before me. Patience is what's needed and the ability to leave the mead well alone for the months that follow. Occasionally it can be checked, but for the best part of 6-8 months, leave well alone in a cool space. The temptation to just go and take a look had to be ignored.
Finally, the day arrived to gently pick up the demijohn and syphon the honey mead into bottles. The first bottle was a bit haphazardly poured but I soon got the hang of it and finished up with eight bottles of home-produced honey mead. It's a great feeling to stand back and say "I made that"! Each bottle already has a friend or family member's name on it who will receive a bottle this Christmas. Of course, there's always one left for the beekeeper too... Cheers!
The image used has been published under the terms of a Creative Commons License and is attributed to Jenifer Tucker.